Notes for Build a Real-Time Data Syncing Chat Application with Supabase and Next.js
Supabase is an open source Firebase alternative. Firebase is a free service that provides cloud-based storage and realtime communication for your mobile apps. With Supabase, you can create a simple, scalable, and secure backend for your apps.
To get started, you create an account on supabase.io by logging in with your GitHub account.
When you make your first project, you'll be able to change the name later, but use a secure password and choose your region based on where your customers are located.
After a few minutes your backend will be provisioned and you'll be able to start using its features, like
- Postgres database
- Authentication
- APIs
- Serverless functions
- Realtime subscriptions
Navigate the Supabase Admin Interface
Table editor
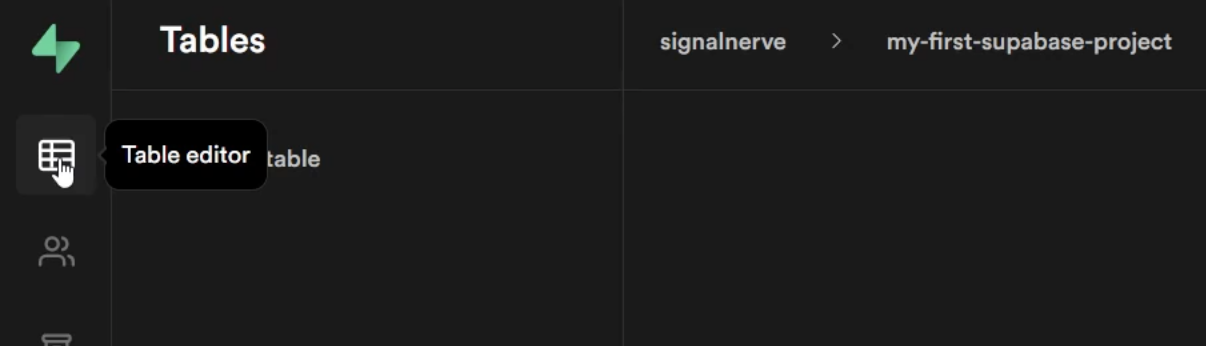
Once you've created a project, you'll be able to create tables and add data to them. The contents of your table will live in this section, and you can edit it freely.
Authentication
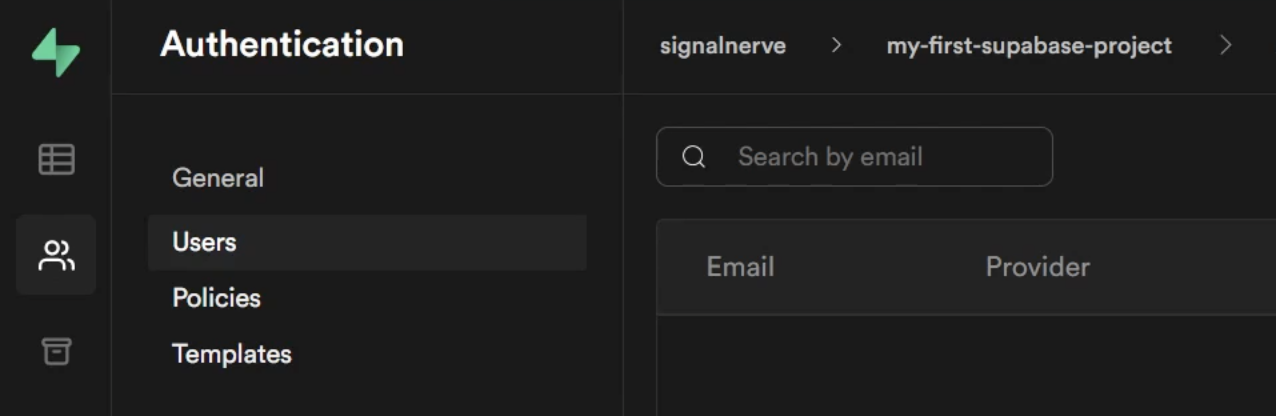
The authentication section is where you can set up the users and their permissions. Users can be authenticated by several providers, including Google, GitHub, GitLab, Azure, Facebook, and BitBucket.
Templates for the emails that are sent out when a user wants to reset their password or make a new account are also modifiable and in this section.
At the bottom of the Settings page, you'll find server logs for the authentication attempts.
Storage
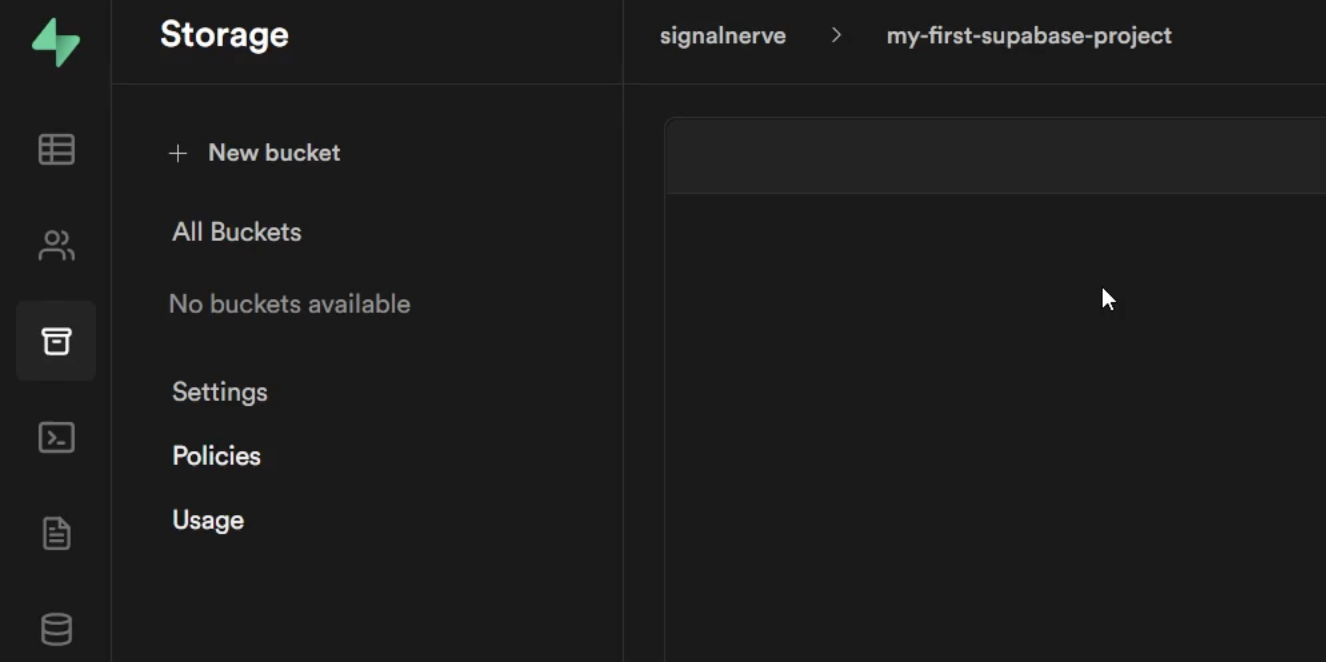
The storage section is where you can create and manage your buckets. Buckets work similarly to S3, where files are uploaded into buckets and permissions can be set on a bucket-by-bucket basis.
SQL
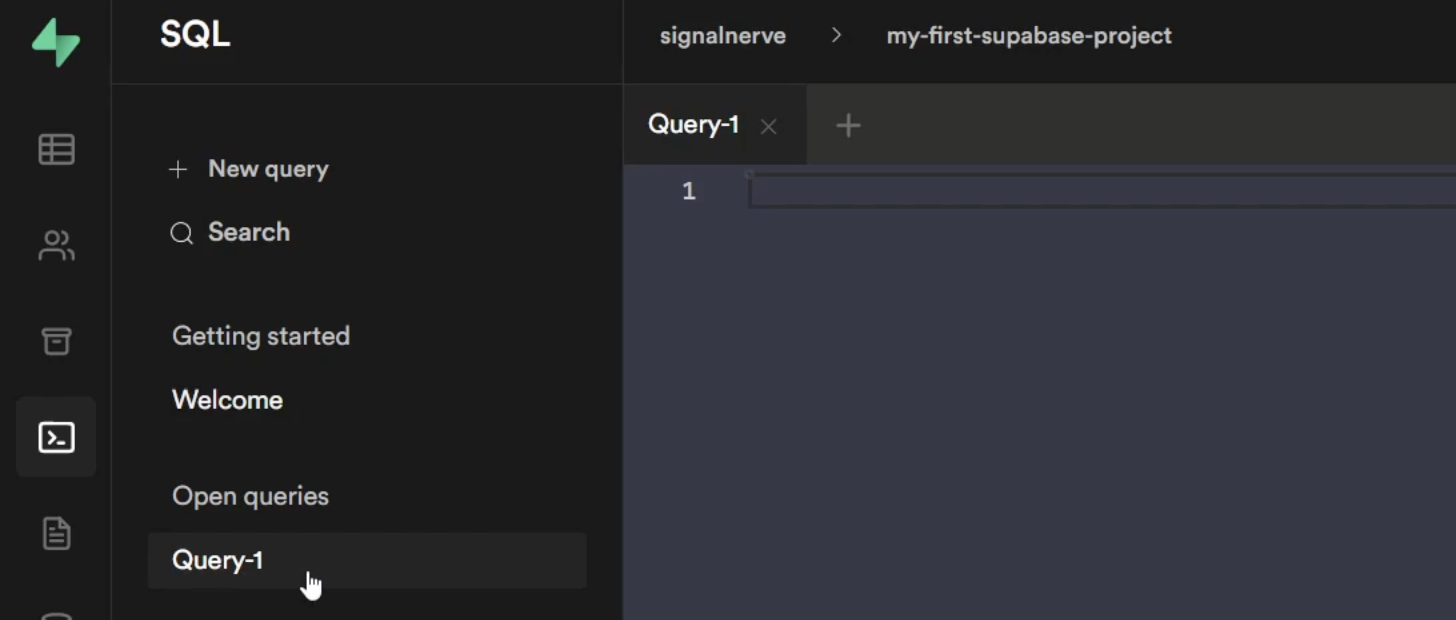
Supabase also lets you run SQL scripts against your databases (and see the results) directly in the admin interface. It comes with shortcuts for common activities, like creating a table or adding a column, but you can also run any SQL query you want.
Queries can be saved and starred to make them easier to re-use.
API
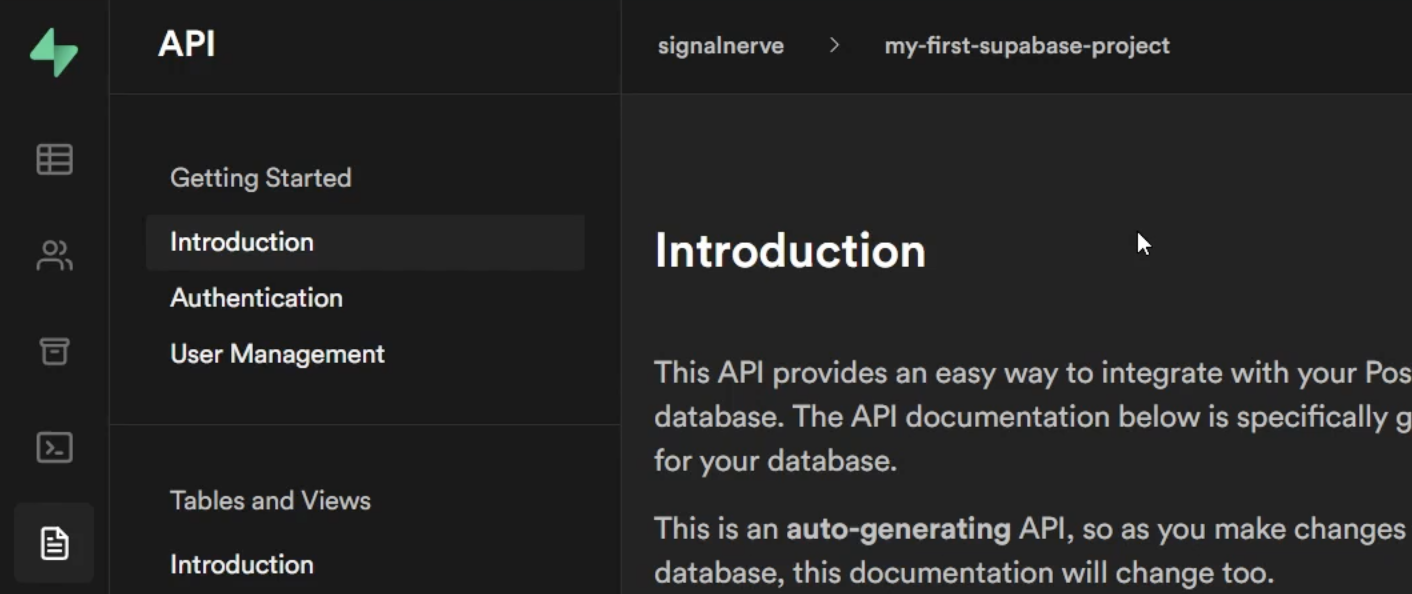
The API section is auto-generated documentation for interacting with your database. As you make changes to the database structure, the documentation here will auto-update to reflect the changes and instruct you on the proper way to use it.
Database
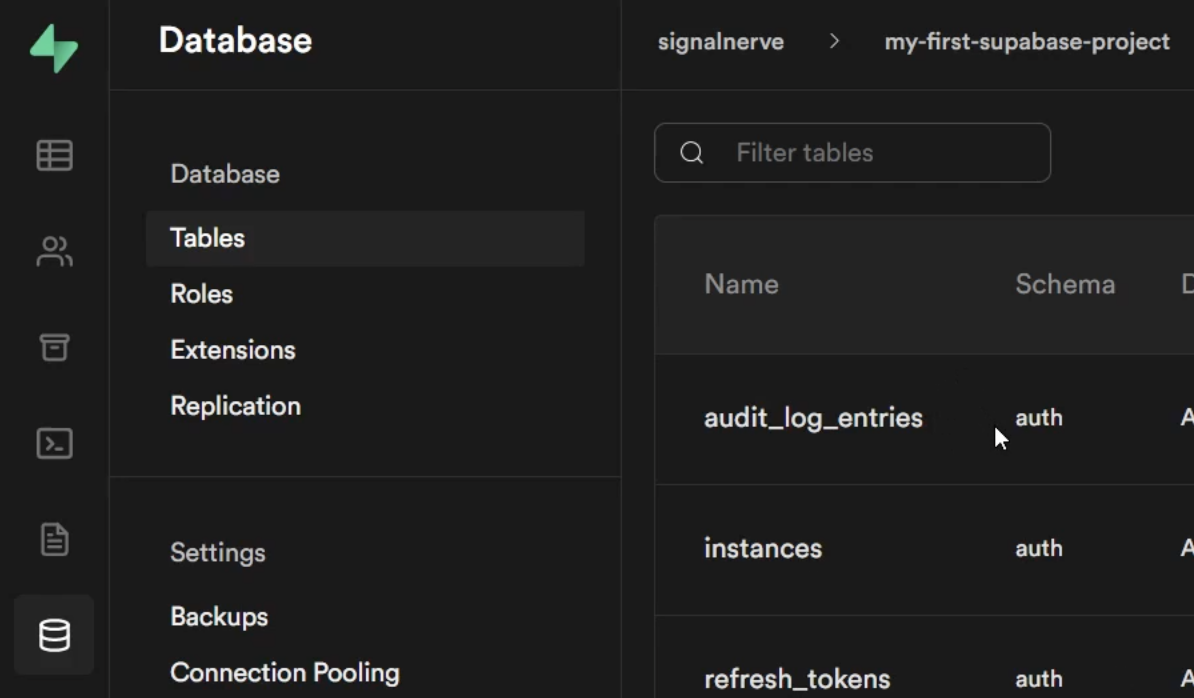
The Database section contains detailed information about your database, including the tables that are created to manage authentication and metadata about columns and filesizes.
You can manage the permission roles for your database by clicking on the roles tab, and track how many agents are using each.
Postgres extensions can be added here if you want additional functionality like a data type for case insensitive character strings or key/value pairs.
Databases are backed up daily and you can view them on the admin interface.
In the final subsection, labelled connection pooling, you can configure connections to the database and modify the user or SSL certificates you want to connect with.
Create PostgreSQL Tables Using Supabase's Interface
In the Table Editor, create a table.
If you want to prevent malicious users from being able to guess the IDs of documents, you can change the primary key of your table from an auto-incrementing integer to a UUID.
You can use foreign keys to link a column on one table to a column on another, for example to link a user ID on a message table to a user ID on a user table. Beside each foreign key is a little arrow that links to the table on the other end of the relation.
Configure Supabase Auth to Allow Users to Login with GitHub
Before you can use GitHub as an authentication provider, you need to create a new application on GitHub and add the client ID and secret to the Supabase Auth configuration.
During development, you can set the Homepage URL to http://localhost:3000, but the callback URL should link to your deployed Supabase project.
https://12345678901234567890.supabase.co/auth/v1/callbackThere is a full guide on how to set up GitHub authentication with Supabase.
Use Triggers to Automatically Update Your Supabase Tables
Tables are created in different databases. The tables that are auto-generated for authentication are in the auth database, and the tables created in the table editor are in the public database. Communication is not allowed between these two databases, so if you want to use the auth database to store users, you need to create a trigger to automatically update the public database every time a new user signs up.
This is documented in the Supabase documentation.
Set up a Supabase Client in Next.js
Install the Supabase client in your project:
npm install @supabase/supabase-jsCreate a .env.local file in the root of your project and add the Supabase URL and API key from the Settings -> API section of your Supabase admin interface.
NEXT_PUBLIC_SUPABASE_URL="https://12345678901234567890.supabase.co"
NEXT_PUBLIC_SUPABASE_API_KEY="eyJhbGciOiJIUzI1NiIsInR5cCI6IkpXVCJ9.eyJzdWIiOiIxMjM0NTY3ODkwIiwibmFtZSI6IkpvaG4gRG9lIiwiaWF0IjoxNTE2MjM5MDIyfQ.SflKxwRJSMeKKF2QT4fwpMeJf36POk6yJV_adQssw5c"
Create a custom hook called useSupabase
import { createClient } from "@supabase/supabase-js"
import { useState } from "react"

const supabase = createClient(
  process.env.NEXT_PUBLIC_SUPABASE_URL,
  process.env.NEXT_PUBLIC_SUPABASE_API_KEY,
)

export default function useSupabase() {
  const [session, setSession] = useState(
    supabase.auth.session(),
  )

  supabase.auth.onAuthStateChange(
    async (_event, session) => {
      setSession(session)
    },
  )

  return { session, supabase }
}
In the _app.js file, we can use this hook and inject the session and supabase info onto each page.
import React from 'react'
import { useSupabase } from './hooks/useSupabase'

export default function App({ Component, pageProps }) {
  const { session, supabase } = useSupabase()
  return (
    <Component {...{ session, supabase }} {...pageProps} />
}
They're now automatically accessible on each page
export default function Home({ session, supabase }) {}Set up a Login Page in Next.js with Supabase's auth.session()
You can run a Next.js app in development mode on a different port by setting the PORT environment variable in the start script
PORT=3001 npm run devThe session prop will be truthy if the user is logged in, and falsy if the user is not logged in.
import * as React from "react"

export default function Home({ session }) {
  const [isLoggedIn, setLoggedIn] = React.useState(false)

  React.useEffect(() => {
    setLoggedIn(Boolean(session))
  }, [session])

  return (
    <main>
      {isLoggedIn ? (
        <span> Logged in </span>
      ) : (
        <span> Not logged in </span>
      )}
    </main>
  )
}
Set up GitHub Authorization with Supabas
<button
  onClick={() =>
    supabase.auth.signIn({
      provider: "github",
    })
  }
>
  Log in with GitHub
</button>
Manage Third-Party Authorization Errors in Supabase
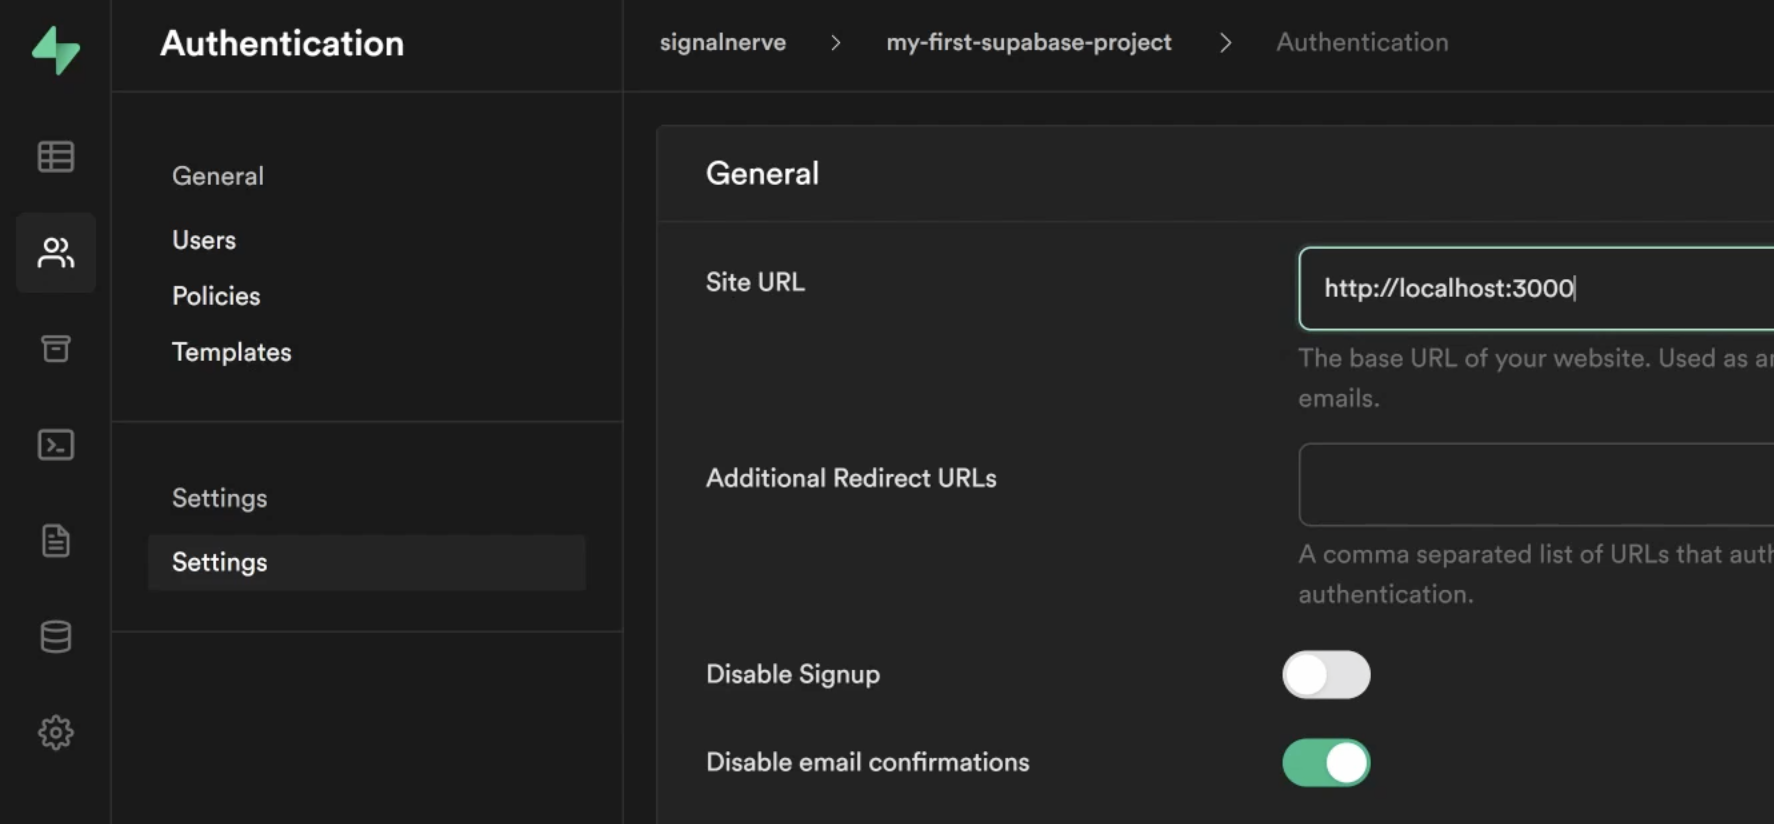
If you don't want to require the user to confirm their email when they log in with a third-party provider, you can check the "Disable email confirmations" switch in the authentication settings page.
Also make sure the site URL is correct. If you changed the port number for development, you should also change that here.
http://localhost:3001If you fail to authorize a user the first time, perhaps because of configuration issues, you can delete them from your users table and try again once the configuration has been corrected.
Executing Raw SQL using Supabase's Interface
select * from auth.users
Retrieve Data with a Supabase API Request
import { useSupabase } from "./hooks/useSupabase"

export default function Chat() {
  const { supabase } = useSupabase()
  const [messages, setMessages] = React.useState([])

  React.useEffect(() => {
    supabase
      .from("message")
      .select("*")
      .then(({ data: messages, error }) => {
        setMessages(messages)
      })
  }, [])

  return (
    <div>
      <h1>Supabase Chat</h1>
      <div>
        {messages.map((message) => (
          <p key={message.id}>{message.content}</p>
        ))}
      </div>
    </div>
  )
}
Subscribe to Database Changes using Supabase's Realtime Client
Supabase currently (August 2021) does not have a way to authenticate subscriptions, but that feature is planned in the roadmap.
React.useEffect(() => {
  supabase
    .from("message")
    .on("INSERT", (payload) =>
      setMessages((messages) =>
        [].concat(messages, payload.new),
      ),
    )
    .subscribe()
}, [])
Enable Realtime Only for Individual Tables using supabase_realtime
For performance reasons, Supabase does not automatically track all the data necessary for realtime subscriptions to all tables and all data, but you can configure it to do so.
In the SQL tab, you can create a publication to add each table you want to subscribe to, and alter the table to replicate with the information you want to be available to subscribers.
begin;
  -- drop the publication if exists
  drop publication if exists supabase_realtime;

  -- re-create the publication
  create publication supabase_realtime;
commit;

-- allow realtime subscriptions for new messages
alter publication supabase_realtime add table public.message;
-- also send the previous message to the client
alter table public.message replica identity full;

-- allow realtime subscriptions for new users
alter publication supabase_realtime add table public.user;
-- also send the previous user to the client
alter table public.user replica identity full;
Insert Submitted Data to Supabase Tables
If the application is rendering messages by subscribing to the messages collection, the only thing you need to do is to insert the message into the messages collection and it should appear on the page.
export default function Chat({ session, supabase }) {
  const [messages, setMessages] = React.useState([])

  async function handleSubmit(event) {
    event.preventDefault()

    const form = new FormData(event.target)
    const input = form.get("message")

    await supabase.from("message").insert([
      {
        content: input.value,
        user_id: session.user.id,
      },
    ])

    // Clear the input after submission
    input.value = ""
  }

  return (
    <div>
      <h1>Supabase Chat</h1>
      <div>
        {messages.map((message) => (
          <p key={message.id}>{message.content}</p>
        ))}

        <form onSubmit={handleSubmit}>
          <input
            type="text"
            aria-label="Message"
            required
            name="message"
          />
          <button type="submit"> Send </button>
        </form>
      </div>
    </div>
  )
}
Keep Track of the Current User Using Next.js with Supabase
const [currentUser, setCurrentUser] = React.useState(null)

useEffect(() => {
  if (session?.user.id) {
    supabase
      .from("user")
      .select("*")
      .eq("id", session.user.id)
      .then(({ data: users }) => {
        if (users.length === 0) {
          throw new Error("User not found")
        }

        return users[0]
      })
      .then((user) => {
        setCurrentUser(user)

        // Subscribe to changes to the user
        return supabase
          .from(`user:id=eq.${foundUser.id}`)
          .on("UPDATE", (payload) => {
            setCurrentUser(payload.new)
          })
          .subscribe()
      })
  }
}, [session?.user.id])
Logout and Update Users with React and Supebase's upsert Method
Log out
Supabase has a built in function for logging out, but it may be preferable to do it manually by clearing the local storage and forcing a reload.
import * as React from "react"

export default function Home({
  currentUser,
  session,
  supabase,
}) {
  const [isLoggedIn, setLoggedIn] = React.useState(false)

  React.useEffect(() => {
    setLoggedIn(Boolean(session))
  }, [session])

  function handleLogout(event) {
    event.preventDefault()

    window.localStorage.clear()
    window.location.reload()
  }

  return (
    <main>
      {isLoggedIn ? (
        <div>
          <div>
            Welcome,
            <span>
              {currentUser.username
                ? currentUser.username
                : session.user.email}
            </span>
          </div>

          <button onClick={logout}>Log out</button>
        </div>
      ) : (
        <span> Not logged in </span>
      )}
    </main>
  )
}
Update username
To update a username, insert a document with the new contents set
import * as React from "react"

export default function Home({
  currentUser,
  session,
  supabase,
}) {
  const [editingUsername, setEditingUsername] =
    React.useState(false)

  async function handleSubmit(event) {
    event.preventDefault()

    const form = new FormData(event.target)
    const input = form.get("username")

    await supabase.from("user").insert(
      [
        {
          ...currentUser,
          username: input.value,
        },
      ],
      { upsert: true },
    )

    // Clear the input after submission
    input.value = ""

    setEditingUsername(false)
  }

  return (
    <main>
      <div>
        <div>
          Welcome,
          <span>
            {currentUser.username
              ? currentUser.username
              : session.user.email}
          </span>
        </div>

        {editingUsername ? (
          <form onSubmit={handleSubmit}>
            <input
              type="text"
              aria-label="Username"
              required
              name="username"
              default-value={currentUser.username}
            />
            <button type="submit">Save</button>
          </form>
        ) : (
          <button onClick={() => setEditingUsername(true)}>
            Change Username
          </button>
        )}
      </div>
    </main>
  )
}
Request User Details for a Given User Using Supabase's API
const [users, setUsers] = React.useState({})

React.useEffect(() => {
  const userIdSet = new Set(
    messages.map((message) => message.user_id),
  )

  const usersToGet = Array.from(userIdSet).filter(
    (id) => !users[id],
  )

  if (
    Object.keys(users).length === 0 ||
    usersToGet.length !== 0
  ) {
    supabase
      .from("user")
      .select("id, username")
      .in("id", usersToGet)
      .then(({ data }) => {
        const newUsers = {}
        data.forEach((user) => (newUsers[user.id] = user))

        setUsers((users) => {
          return {
            ...users,
            ...newUsers,
          }
        })
      })
  }
}, [messages])
Retrieve and Displaying User Details with User Subscriptions
In order for the usernames to update in the application when tehy're changed, we need to set up a subscription for it.
React.useEffect(() => {
  supabase
    .from("user")
    .on("INSERT", (payload) =>
      setUsers((users) => {
        const user = users[payload.new.id]

        return user
          ? {
              ...users,
              [payload.new.id]: payload.new,
            }
          : users
      }),
    )
    .subscribe()
}, [])
Deploy a Supabase Application to Production with Cloudflare Pages
Once you deploy your application, you need to update the Site URL in your authentication settings to match the new production URL